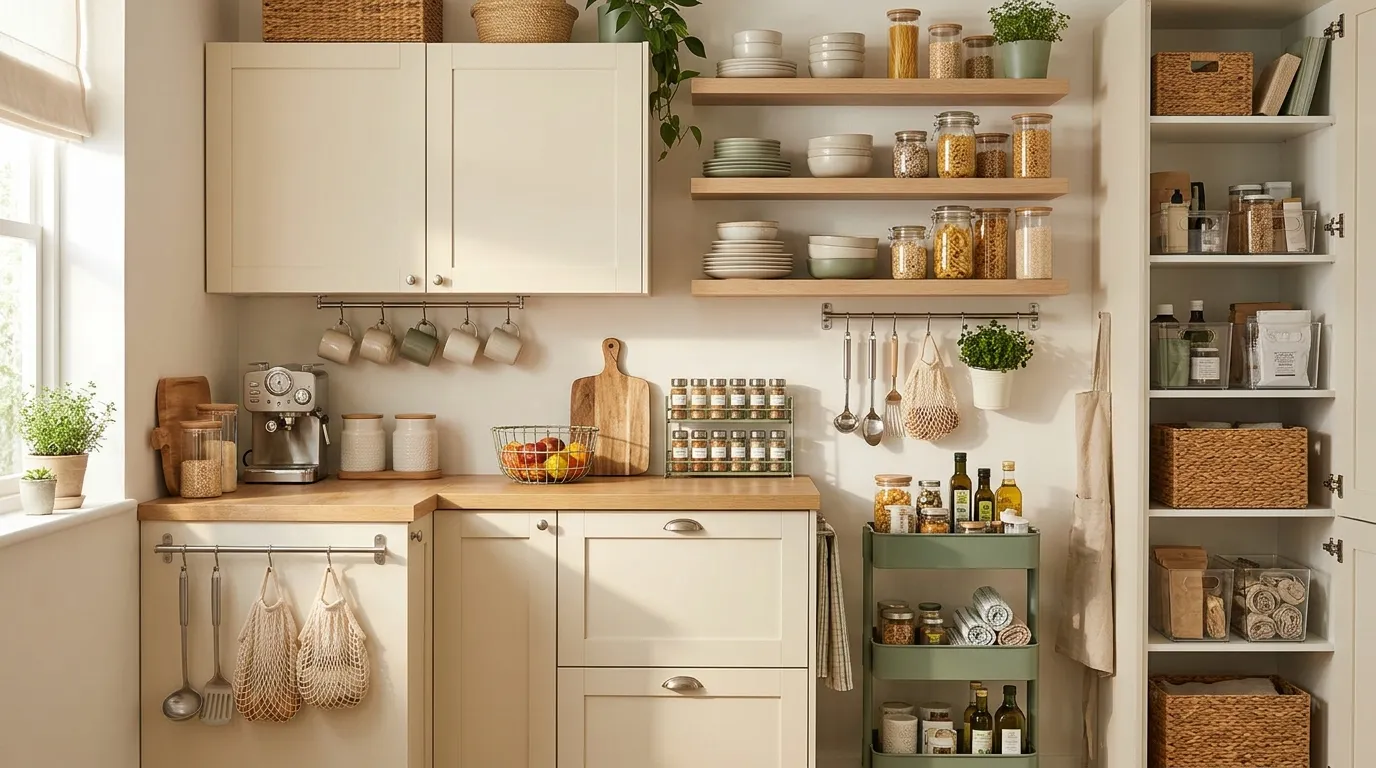
20 Small Kitchen Organisation Ideas for Effortless Order
A small kitchen can feel crowded before the day even begins, but a few clever changes can make it feel lighter, tidier, and easier to use. The secret to small kitchen organisation ideas is making every shelf, drawer, and corner work a little harder without sacrificing style.
Whether you’re struggling with overflowing cupboards, cluttered countertops, or limited pantry space, these 20 practical ideas will help you find a place for everyday essentials while creating a kitchen you genuinely enjoy spending time in. From vertical wall shelves and stackable organisers to rolling carts and clever storage baskets, each idea offers inspiration you can adapt to your home and budget.
I’ve noticed that the most useful organising solutions aren’t always the biggest or most expensive. Often, moving a few everyday items into better positions makes cooking, cleaning, and putting groceries away feel much simpler. Explore these ideas, choose the ones that suit your kitchen, and discover how small adjustments can make a meaningful difference.
Vertical Wall Shelves

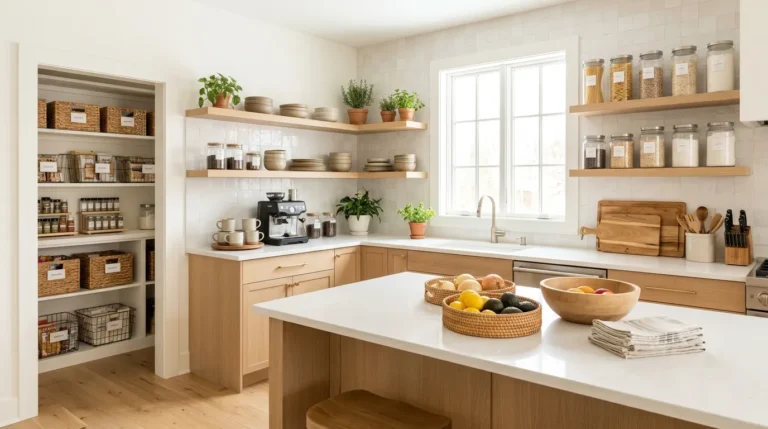
Empty wall space can become valuable storage when your cabinets are already full. Install a few sturdy shelves above a countertop or beside the refrigerator to hold everyday dishes, spice jars, and attractive pantry containers. Keep frequently used items on the lowest shelf so they remain easy to reach.
For a cohesive look, repeat two or three materials, such as clear glass, white ceramic, and natural wood. Before installing shelves, check the wall structure and choose suitable fixings for the expected weight. Leave enough room underneath for food preparation and small appliances.
Drawer Organiser Trays

- Measure the drawer: Check its interior width, depth, and height before buying inserts.
- Group similar tools: Keep cutlery together, cooking utensils in another section, and small gadgets in a separate compartment.
- Choose adjustable trays: Expandable organisers help use the available width without leaving awkward gaps.
- Store daily essentials upfront: Put frequently used spoons, scissors, and peelers where you can grab them quickly.
- Review oversized gadgets: Move rarely used tools elsewhere if they crowd the drawer.
Organiser trays stop small kitchen tools from sliding into messy piles every time you open a drawer. Bamboo adds warmth, while washable plastic is useful for areas that collect crumbs or moisture. Leave enough clearance for the drawer to close smoothly, and keep sharp tools safely separated from everyday cutlery.
Clear Pantry Containers

Quick Tip:
Choose airtight containers in a few standard sizes so they stack neatly and make the most of limited shelf height. Label each container with the food name and, when useful, its expiration or opening date. Only transfer dry goods into clean, completely dry containers.
Clear containers help you see what you already have before buying more groceries, reducing forgotten ingredients and duplicate purchases. Measure your shelves first, especially the space between shelves, and choose containers that fit comfortably without needing to be tipped. Keep original packaging information for cooking instructions, allergen details, and expiration dates when needed.
Magnetic Fridge Storage

BEFORE:
The refrigerator side sits unused while spices, kitchen rolls, and small essentials compete for space on the countertop. Everyday cooking feels less organized because frequently needed items have no dedicated home.
AFTER:
Slim magnetic racks turn that overlooked surface into convenient vertical storage. Spices stay together, paper towels remain accessible, and the countertop gains more room for chopping and meal preparation.
Check that your refrigerator side is magnetic before purchasing a rack, since some stainless steel finishes are not. Choose products with secure attachments and clear weight limits. Keep heavy glass containers low, and avoid placing items where they could interfere with ventilation, doors, or nearby appliances.
Under-Sink Pull-Out Bins

- Empty the cabinet: Remove supplies and wipe down the base before measuring the space.
- Measure around pipes: Check the cabinet width, depth, height, and plumbing position.
- Choose suitable bins: Select pull-out organisers that fit around the pipes without blocking access.
- Group cleaning supplies: Keep dish soap and sponges together, with spare bags and cloths in another bin.
- Leave room for inspection: Avoid packing items tightly around pipe joints or potential leak areas.
The cabinet beneath your sink can hold more than you expect when supplies are grouped in removable bins. Pull-out designs make items at the back easier to reach, while handles simplify cleaning. Check for leaks regularly, store chemicals safely away from children, and keep products in their original labelled containers.
Stack-able Shelf Risers
| Feature | Shelf Risers | Single-Level Storage |
| Vertical space | Creates extra usable levels | Leaves space above items unused |
| Accessibility | Separates plates and bowls | Stacks may need to be lifted |
| Best use | Cups, dishes, small pantry goods | Tall appliances and large cookware |
| Setup | Usually ready to place | No extra setup required |
| Main benefit | Makes cupboard contents easier to see | Works for items needing full-height space |
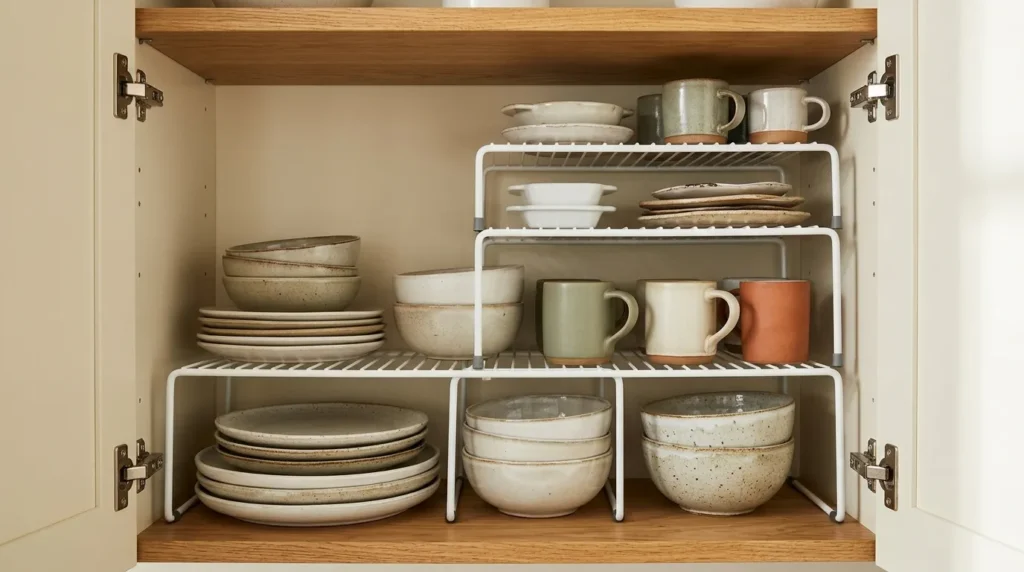
Shelf risers help make better use of the height inside crowded cabinets without requiring renovation. Measure the cupboard before buying, including the clearance needed for taller mugs or bowls. Choose sturdy risers that sit flat, and avoid overloading them with heavy cookware. Keep everyday dishes on the easiest level to reach.
Hanging Mug Hooks

DO:
- Install sturdy hooks beneath a cabinet shelf that has enough clearance for hanging mugs.
- Keep your most-used cups near the kettle or coffee station.
- Choose matching mugs to create a tidy, coordinated display.
- Check the shelf material and weight limit before attaching hooks.
DON’T:
- Hang heavy mugs from weak adhesive hooks.
- Place cups so low that they obstruct the countertop workspace.
- Crowd hooks together until handles become difficult to remove.
- Store damp mugs where trapped moisture cannot dry properly.
Hanging mugs frees up cupboard shelves for bowls, glasses, and other essentials while adding a welcoming coffee-corner touch. Leave enough space between each cup for easy handling, and position the hooks away from cooking splashes. A small, consistent collection looks neater than a crowded row of mismatched mugs.
Rolling Kitchen Cart

Cost: Low to moderate, depending on the cart material and size.
Time: Around 10 to 20 minutes for a ready-to-assemble model.
Skill Level: Beginner-friendly, with basic assembly for most designs.
Best For: Extra pantry storage, frequently used appliances, produce baskets, or a compact coffee station.
A narrow cart can create useful storage in the gap beside a refrigerator, along a spare wall, or near a kitchen entrance. Measure the full footprint and check that the wheels can move without hitting cabinet handles. Keep heavier items on the bottom shelf, lock the wheels while working, and avoid blocking walkways.
Cabinet Door Organisers

Quick Tip:
Choose an over-door organiser that fits your cabinet thickness and leaves enough room for the door to close fully. Measure the available space around hinges and shelves before buying, and check the product’s weight limit.
Cabinet doors can provide valuable storage for flat items that otherwise take up entire shelves. Use a lid rack for cookware covers or a slim holder for cutting boards, keeping each item easy to remove. Avoid storing heavy objects on lightweight doors, and make sure the organiser will not catch on nearby drawers.
Tiered Spice Racks

BEFORE:
Spice jars are crowded together on one cupboard shelf, hiding smaller containers behind taller ones. Finding cumin, paprika, or cinnamon during cooking means moving jars around, and duplicate purchases become more likely.
AFTER:
A tiered rack creates stepped levels so labels remain visible and every jar has a clear place. Frequently used seasonings sit at the front, while occasional ingredients occupy the back rows.
Measure the cupboard height and depth before choosing a rack, especially if the shelf above is fixed. Arrange spices by cooking style or frequency of use, and label the lids if you prefer storing jars in a drawer. Keep containers away from heat and steam to preserve their flavor for longer.
Fold-able Dish Drying Rack

- Measure the sink: Check its width and shape so the rack fits securely without wobbling.
- Choose a foldable design: Look for a rack that rolls up or folds flat when it is not needed.
- Dry only what you need: Place washed plates, glasses, and utensils in separate sections to improve airflow.
- Store it away: Once dishes are dry, fold the rack and keep it in a nearby drawer or cupboard.
- Clean it regularly: Remove food residue and allow the rack to dry fully between uses.
A foldable drying rack keeps dishes off valuable countertop space and gives you room for food preparation when washing up is finished. Choose a rust-resistant model with a non-slip surface, and make sure it is rated for your sink setup. Avoid overloading it, and keep fragile glasses stable while they dry.
Our Facebook Page : Blossom Dream Decor
Nested Mixing Bowls

| Feature | Nested Bowls | Separate Bowl Storage |
| Space required | Uses one compact footprint | Takes up more shelf area |
| Organization | Keeps matching sizes together | Makes individual bowls easy to spot |
| Accessibility | Larger bowls may need lifting | Each bowl can be reached directly |
| Best for | Small cupboards and limited shelves | Large kitchens with extra cabinet space |
| Extra benefit | Can keep matching lids together | Works well for unusually shaped bowls |
Nested bowls are a simple way to reclaim cabinet space without buying a new organiser. Choose a set with graduated sizes that fit inside one another, and store lids vertically in a nearby divider if they do not nest. Keep your most-used mixing bowl on top so everyday meal preparation stays quick and convenient.
Wall-Mounted Knife Strip

- Choose the right position: Select a sturdy wall area away from busy walkways and safely out of children’s reach.
- Check the mounting surface: Follow the manufacturer’s instructions and use suitable fixings for your wall type.
- Arrange knives carefully: Place blades securely against the magnetic strip with handles easy to grasp.
- Keep the strip clean: Wipe away moisture and food residue regularly, following the product’s care instructions.
A wall-mounted knife strip frees up drawer space and keeps cooking tools visible when you need them. Choose a model strong enough to hold your knives securely, and make sure the blades cannot be knocked loose during everyday kitchen tasks. If wall mounting is unsuitable, a compact in-drawer knife organiser is a safer alternative to loose blades.
Vertical Baking Sheet Storage

Quick Tip:
Use a sturdy vertical rack or adjustable dividers to separate baking sheets, cutting boards, and oven trays by size. Measure the cabinet depth and the tallest item first, then leave enough clearance to slide each piece out without shifting the others.
Storing flat cookware upright makes better use of narrow cabinet spaces and prevents heavy stacks from becoming difficult to manage. Place frequently used trays near the front and group similar items together. Choose dividers that support the weight of your cookware, and avoid forcing oversized sheets into a rack that could tip or bend.
Compact Coffee Station
DO:
- Group coffee, tea, sugar, and filters together on one tray.
- Keep mugs nearby so your morning routine needs fewer steps.
- Use small labelled jars for frequently used supplies.
- Choose a corner near an outlet that leaves the main prep area clear.
DON’T:
- Fill the station with appliances you rarely use.
- Store supplies where steam or heat could affect them.
- Let used spoons, empty packets, and loose lids collect on the tray.
- Block access to sockets or crowd the kettle with other objects.
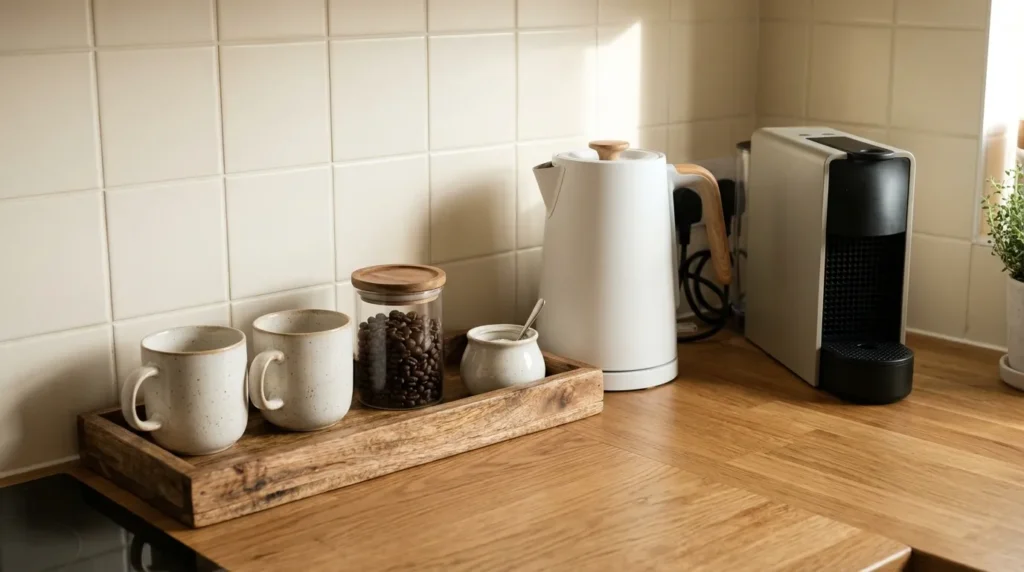
A dedicated coffee corner gives everyday drinks and their accessories a clear home without taking over the kitchen. A small tray makes the setup easy to lift and clean, while a narrow shelf can hold extra mugs if counter space is limited. Keep only daily essentials on display and store backup supplies elsewhere.
Pull-Out Pantry Drawers

Cost: Moderate, depending on the drawer system and installation requirements.
Time: Around 30 minutes to several hours, depending on whether the units are ready-made or require fitting.
Skill Level: Beginner-friendly for freestanding organisers; intermediate for cabinet-mounted hardware.
Best For: Deep cupboards where food packets and cans often disappear behind other items.
Pull-out pantry drawers make deep cabinets easier to use because supplies slide forward instead of getting buried at the back. Group breakfast foods, baking ingredients, canned goods, and snacks into separate sections so everyone can find things quickly. Measure carefully before buying, check the drawer’s weight limit, and leave space for hinges and plumbing where relevant.
Our Instagram : Blossom Dream Decor
Reusable Bag Storage

BEFORE:
Reusable shopping bags pile up in a cupboard or drawer, making it hard to grab one without pulling out several. Small produce bags become tangled, while larger totes take up more room than necessary.
AFTER:
Folded bags stand neatly in a divided drawer or compact fabric bin, sorted by size and purpose. Each bag is easy to see and remove, and the storage area stays tidy after grocery trips.
Fold each bag into a compact rectangle or roll it loosely before placing it in its section. Keep insulated bags separate from lightweight totes, and make sure reusable bags are clean and completely dry before storing them. A small basket near the exit can hold the bags you use most often for shopping.
Hanging Fruit Basket

Quick Tip:
Choose a hanging basket with a secure, weight-rated hook and position it where people will not bump into it. Keep heavier fruit on the lower tier, avoid overfilling the baskets, and check that the ceiling or mounting point can safely support the combined weight.
A hanging fruit basket frees up counter space while keeping produce visible for everyday snacking and meal preparation. Sort fruit according to its storage needs rather than putting everything together automatically, since some fruits release ethylene gas that speeds ripening in nearby produce. Keep the basket clean and remove overripe fruit promptly.
Slim Gap Storage
BEFORE:
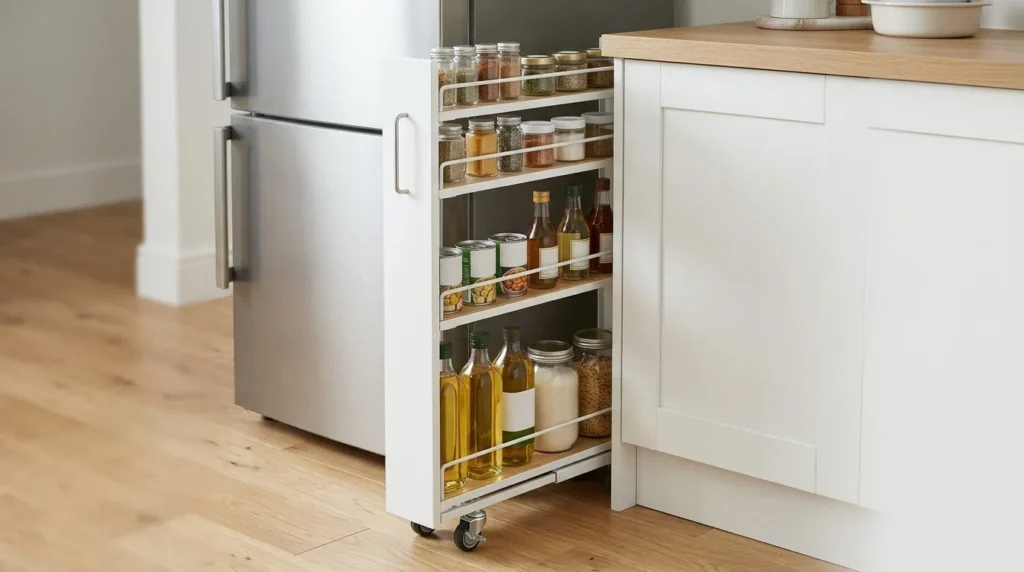
The narrow gap beside a refrigerator or cabinet collects dust but offers little practical use. Bottles and pantry supplies crowd nearby shelves, leaving valuable storage space unused.
AFTER:
A slim rolling trolley turns the gap into accessible storage for oils, jars, cans, or other frequently used essentials. Its narrow profile slides out when needed and tucks away to keep the kitchen looking tidy.
Measure the gap at its narrowest point and check for skirting boards, handles, and door clearance before choosing a trolley. Store heavier items on the bottom shelf to improve stability, and keep the contents within the trolley’s weight limit. Avoid placing heat-sensitive goods beside an oven or other hot appliance.
Read Our Previous Article : 22 No-Buy Home Decor Ideas for a Fresh New Look
Labelled Storage Baskets

- Sort your supplies: Group similar items such as snacks, baking ingredients, and breakfast foods before choosing baskets.
- Measure each shelf: Check the height, width, and depth so baskets fit without scraping cabinet doors.
- Choose practical materials: Use washable bins for frequently handled items and woven baskets for dry, lightweight supplies.
- Add clear labels: Write simple category names that everyone in the household can understand.
- Keep access easy: Place daily essentials at the front and reserve higher shelves for occasional-use items.
Matching baskets make crowded cupboards look calmer and help small items stay together instead of spreading across shelves. Choose containers with handles if you need to pull them forward regularly, and avoid filling them so heavily that lifting becomes awkward. Review the contents every few weeks to remove empty packaging and keep your storage system useful.
CONCLUSION
An organised kitchen doesn’t require a complete makeover or endless storage space. With thoughtful layouts, practical organisers, and a few creative solutions, small kitchen organisation can make your daily routines feel easier and your kitchen more welcoming. Start with one drawer, one cupboard, or one unused corner, then build on your progress as you discover what works best for your home. I’ve seen how small, consistent changes can make a space feel calmer and more functional. Save this article on Pinterest for inspiration, try your favourite ideas, and share it with someone who could use a little more order in their kitchen.


One Comment